How to fix Adobe Photoshop font scaling for High-DPI Displays
High pixel density displays have become quite common thing for new Windows computers. However, a lot of applications still have problems running on high resolution displays. One of such programs is Adobe Photoshop, very popular app for image editing, graphic design and digital art. Though Photoshop is working perfectly fine on an external monitor (not High-DPI), it does not support overriding High DPI scaling behavior on Windows versions 10 and greater. This result in scaling issue when working with Adobe Photoshop – some of the text elements may seem very tiny on high resolution displays, which is very unpleasant thing, especially when you need to work with Photoshop for some time. Use this simple guide to fix Adobe Photoshop font scaling for High-DPI Displays.
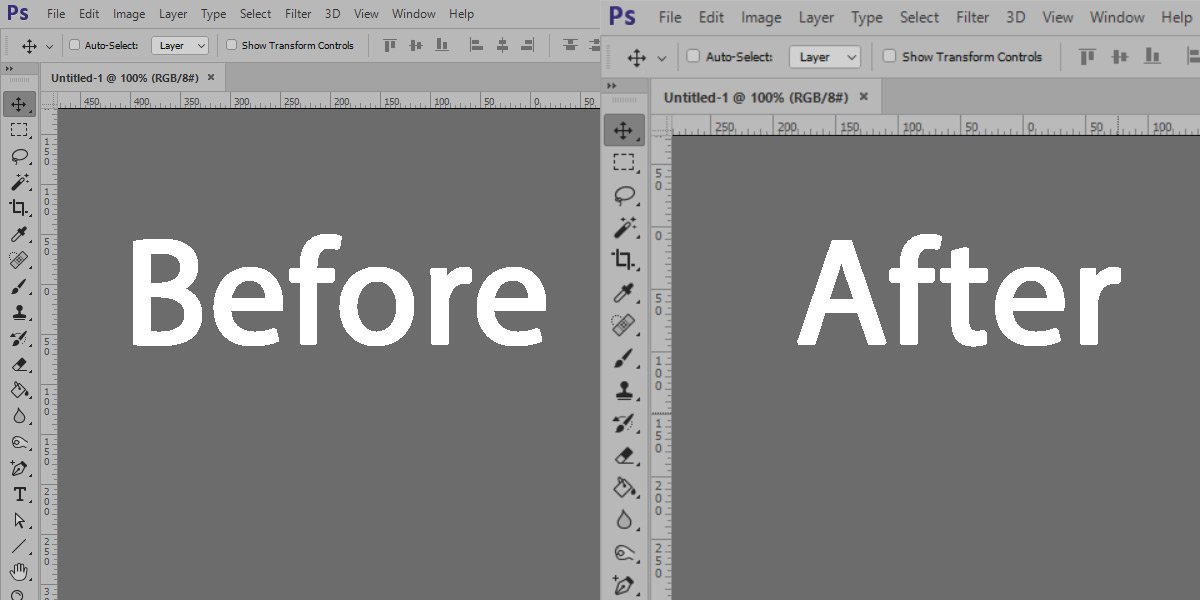
So, basically, the trouble spot is that Windows asks if the program is High-DPI aware and Photoshop answers “yes”, which is the main reason why it end up with an interface with very tiny font size. The symptoms of bad scaling issue in Photoshop: Library panel, Start Screen and other menus do not scale as they should (all to small); the cursor is continuously showing loading circle; drop down lists in menus do not line to the top menu, and so on.
In case you have such trouble on your Windows computer, you should these instructions in order to solve the issue.
Correct scaling configurations
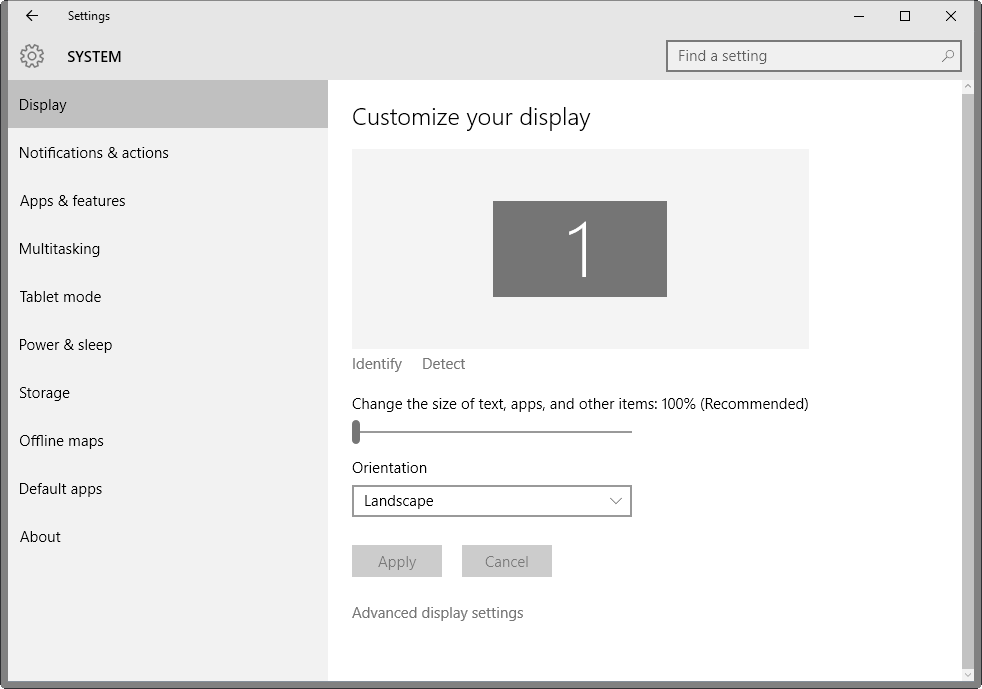
In case you have Windows 10 OS on your computer, follow this guide:
- Do the right mouse click on the desktop and choose Display Settings;
- In the Settings menu you may adjust the current scaling of text, programs, applications and other items on the screen;
- Use the slider to modify the scaling. The level of scaling is set automatically to 100% on Full HD displays and other lower resolution displays. On a larger displays with high resolution, you may try to set the level up to 200%. The scaling will settle automatically as you move the slider;
- It is recommended to restart computer to complete the procedure.
In case you have Windows 7 OS on your computer, use this guide instead:
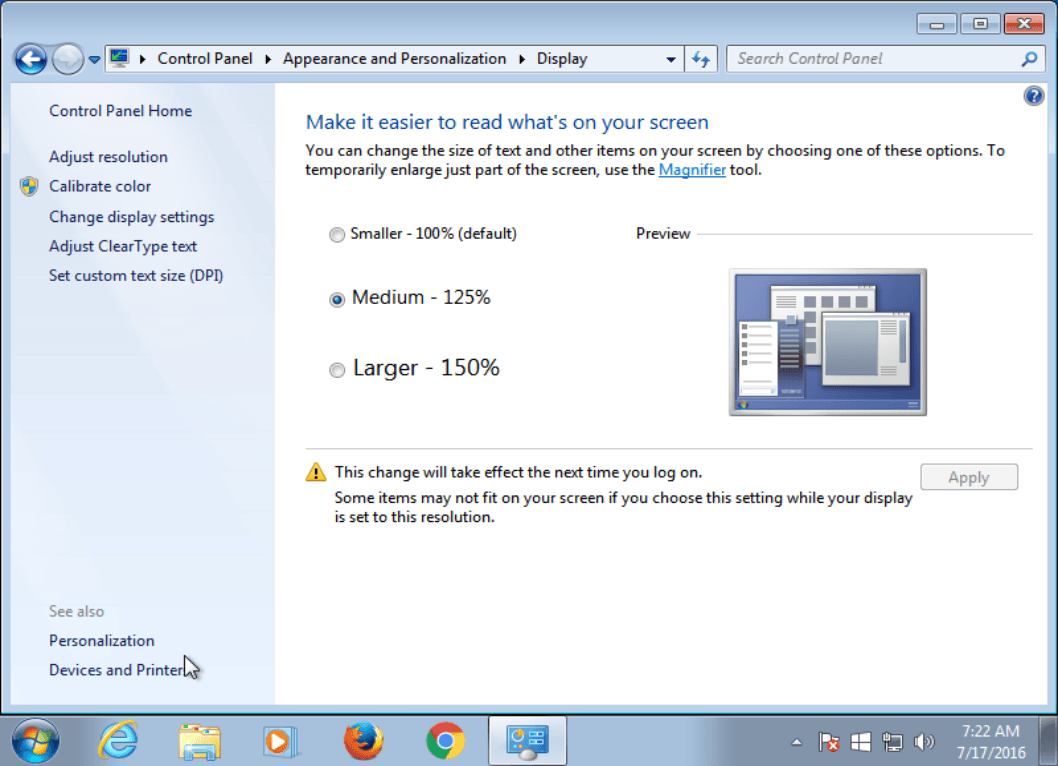
- Do the right mouse click on the desktop and choose Screen Resolution;
- In the Control Panel window, choose Make text and other items larger or smaller option;
- Use this feature to switch to another font size level;
- Push the apply button once you have finished with adjusting process, then restart your computer.
However, you can also try to set custom text size (DPI) configurations on this page before you leave it, if you need to. This feature will allow you to scale font size by making it bigger.
Fix Adobe Photoshop’s settings to scale well
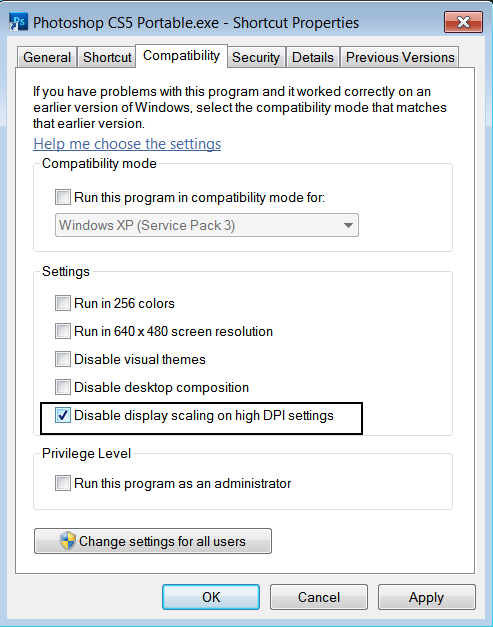
- Do the right mouse click on the Photoshop desktop icon and choose Properties;
- Select the Compatibility tab. You will see the list of compatibility configurations;
- Find disable display scaling on high DPI settings and tick the box;
- You may try out some other features on this page, for instance you may try to disable desktop composition or run the program in a lower resolution;
- Once you have finished, Windows will enforce your compatibility settings;
- It is recommended to restart computer to complete the procedure.
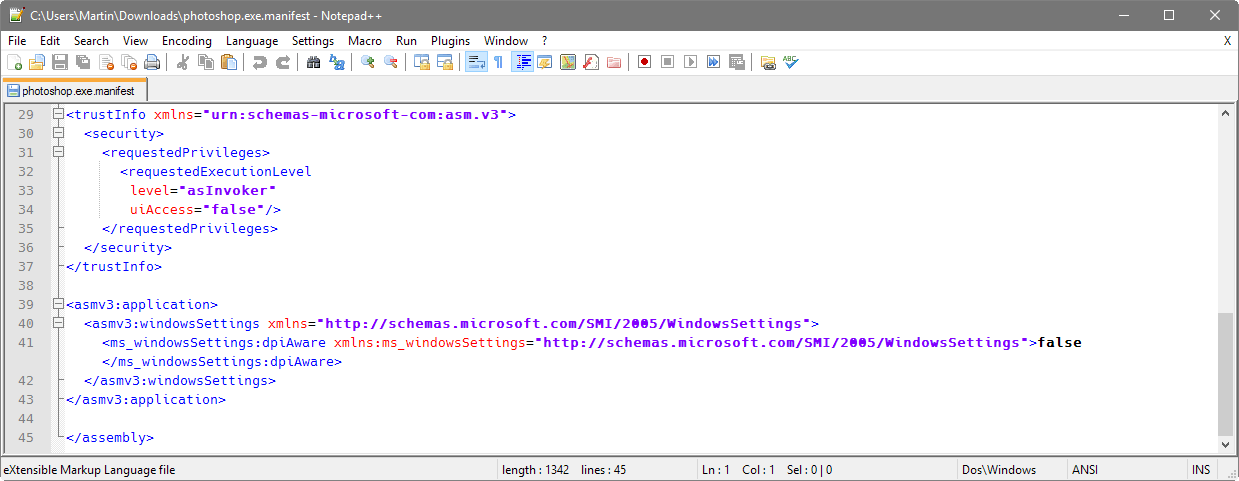
Manifest files
In this method, you need to manage Windows’ configurations to prioritize external manifest files. You may do it by adding a key to the Windows Registry:
- Push the Windows key, then type in regedit.exe and press Enter;
- Confirm User Account Control notification;
- Navigate to HKEY_LOCAL_MACHINE\SOFTWARE\Microsoft\Windows\CurrentVersion\SideBySide from the side menu;
- Do the right mouse click on SideBySide and choose New > Dword (32-bit) value;
- Give it the following name – PreferExternalManifest;
- Do the double mouse click on the newly created Dword and put its value to 1;
- Close the Registry Editor and restart your computer to complete the procedure.
That’s all for now, thank you for your attention, we hope this guide was helpful and simple. If you know any other useful methods – feel free to share them in the comment section below.

